 Key lime pie is a delicious dessert that is deceptively easy to make.
My mom and I love this dessert and I used to make it every spring and summer for her when I visited. If you enjoy a citrus twist in your dessert, I think this will be go-to recipe for you. (It could even turn into one of your “signature dishes”).
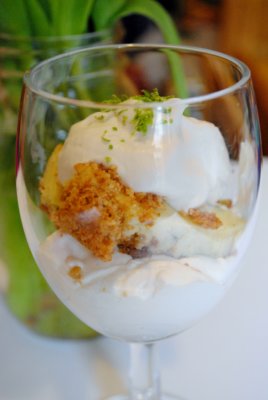
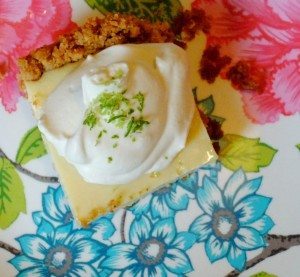
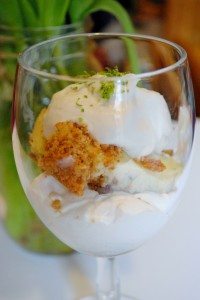
A side note about this dessert- use whatever dish you have available: A traditional pie plate is wonderful but I will use an 8×8 for key lime squares if I don’t have a pie plate on hand. An additional reason to use an 8×8 is to scoop the pie into champagne glasses for a fancy dessert at an event or elegant party.
Home Cook’s Note: there is a printable recipe at http://www.bakeperfectcookies.com
Step 1- Make the crust
Preheat the oven to 350 degrees.
Take 12 graham crackers and put them in a large Ziploc bag. Take a rolling pin and roll over the graham crackers until they are finely crushed. *If you don’t have a rolling pin, use a drinking glass cup.
Melt 2 Tbs. butter. In a medium sized bowl pour in the graham cracker crumb s, melted butter and 2 tsp. sugar.
Mix the ingredients together until they are a crumbly, moist mix (I often use a fork to accomplish a streusel looking mix).
Dump the mixture into the pie plate or 8×8 bake dish. With your hands or the bottom of a measuring cup, press the graham cracker mixture firmly on the floor of the pie pan and up the sides about ½ inch.
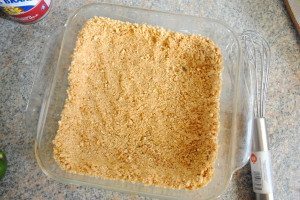
Bake at 350 for 14 minutes.
Step 2- Make the filling
While the crust is baking, mix 3 egg yolks in a bowl.
Add in 1 14 oz. can of condensed milk. With a whisk, mix the egg yolks and condensed milk.
In a measuring cup, pour ½ cup of key lime juice. If key lime juice is unavailable, regular lime juice will suffice just fine. Add in half of the key lime juice (1/4 cup) to the egg yolk and milk mixture. Whisk the juice in. Then, add in the other half.
Take one lime and grate 1 tsp zest.
A quick lesson about zest: After washing the lime, grate just enough of the outside layer to get the green off. Once you see white, stop grating. It’s not unusual to grate ½ of the outside of the lime to get a tsp. of lime.
Add the zest to the mix and whisk a few times.
Your pie filling is ready!
Once the pie crust comes out of the oven, pour the pie filing into the crust and put it right back into the oven for 20 minutes.
After 20 minutes, pull out the pie and allow it to cool for 20 minutes. Then, put the pie in the refrigerator for at least 2 hours for chilling.
Step 3 Top it Off and Serve!
Take a pint of heavy whipping cream and beat it until it starts getting stiff. (Regular whipping cream will work too- you have to beat it a little bit longer).
You can tell the whipping cream is ready by doing this test. Stop the beaters. Take the end of the beater and dip it into the whip cream and quickly pull out the beater. Do little “mountain peaks” remain in place? If the whip cream doesn’t keep its form, keep beating.
When the mountain peaks appear, add in 1 tsp. vanilla and 2 heaping Tbs. powdered sugar. Mix in just until blended.
Now for the fun part; throw the whip cream onto the pie. If you have some extra zest left, sprinkle it in the middle for an aesthetically pleasing touch.
Note: If you are serving the pie individually, as I did in champagne glasses, scoop the pie into the glasses before adding the whip cream.
The first time I made this dessert I felt a little scrambled. I had never made a pie like this before and the technique of making a pie crust and filling is different than a batch of cookies. However, once I discovered how easy it was I had so much fun making it again and again.
People think you’ve slaved over this recipe! It tastes better than many key lime pies I’ve tasted in restaurants (and made quite a few dollars for).
Hope you like it. And, if you have any questions about the recipe, feel free to email me at Melissa@bakeperfectcookies.com
